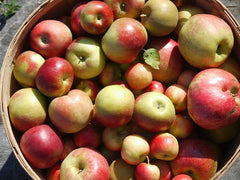
 Making your own hard cider is quite easy (especially compared to beer) and turnaround can be very quick. New York State is known for it’s excellent apples and hard cider is a great way to utilize them. It can also make a perfect gift for the holidays!
Here’s what you need to make a small batch (one gallon) of cider (all available at our store except juice):
- One gallon of apple juice (see below)
- Table sugar (optional)
- Champagne/Wine Yeast
- Yeast Nutrient
- One Gallon Glass Jug
- Sanitizer
- Campden tablets
- Airlock and cap
- Funnel
- Racking cane
- Siphon tubing
- Carbonation Tabs (optional)
- Bottles (8 twelve oz. or 4 twenty-two oz. beer bottles)
- Capper and caps
If you’re brewing beer you probably already have most of the necessary equipment. The next step is to acquire some cider. During the fall many farms sell fresh pressed cider at a local farmer's market.
If using fresh pressed cider it’s best to buy UV (ultra-violet) treated so any unwanted yeast or bacteria are dead. If it’s untreated cider you can treat it with sodium metabisulphite (campden tablets.) Just crush one tablet per gallon and let sit for two days before fermenting. This will kill any wild yeast or bacteria.
If you’re feeling to the task, you can do a DIY crush and press of your apples at home if you have a juicer. Clean your apples thoroughly and juice them. Strain your juice into your sanitized jug and squeeze the pulp in a mesh bag through a funnel. It is a good idea to add a campden tablet to your juice. You don’t have to add any sulphite to your fresh juice if you don’t want to. Wild fermented cider can be delicious, but it might not be. Adding yeast is a way to ensure that you’re not going to get cider vinegar.
You can buy pasteurized cider from the grocery store and good cider can be made with it. Just make sure there are no sorbates added, as this will hinder fermentation. If you want to bump up the alcohol, boil a cup of table sugar with a little water, cool and add to your juice.
The jug that you will be fermenting your juice in needs to be clean and sanitary. The best sanitizer is star san. Just ¼ oz to one gallon of water in your fermenter will sanitize everything within a few minutes. Do not rinse. You can save the Star san mixture in another glass jug for bottling day.
Once you have your juice in a sanitized fermenter it’s time to add nutrient and yeast. Wyeast makes a wine nutrient that works great for cider. Just add quarter teaspoon straight into your juice for a healthy fermentation.
The next step is to add your yeast. Most yeasts come in packs that are good for five gallons, so eyeball a quarter pack and sprinkle it into your juice. Wrap the package tight with a rubber band and store it in your refrigerator for up to a month. You can use it for your next batch. There are several strains of yeast good for cider making. We recommend Red Star Premier Cuvee or Lallemand EC-1118.
Once your yeast is added (pitched), cap the jug with a cap that has a hole in it and put an airlock with sanitizer in the hole. Let sit for a three weeks in a cool spot away from light. During this time the yeast are going to eat up all the delicious sugar and create alcohol!
After three weeks you are ready to bottle. If you want still cider, just siphon your finished cider directly into bottles using the siphon tube and racking cane. Make sure the bottles and siphoning equipment are clean and sanitized! Cap your bottles and let them sit for a week to mellow out. When making still cider you can use wine bottles but you’ll need to cork them.
Put them in the fridge for a day or two and then drink. Congratulations! You are a cider maker!
If you want sparkling cider add one or two carbonation tabs to each bottle before bottling. Make sure to leave a half inch of headspace in the bottle so the cider can carbonate. Do not use wine bottles. You need something heavier like a beer bottle. Once it’s bottled and capped, keep them at a cool room temperature for two weeks before putting them in the fridge. Enjoy!

